Google Blogger has told me I have run out of space to blog with. :(
This is the end of my blogging days you could say. I will keep this blog up just because it is a great reference for me and for those who have used it too for the recipes I have posted. I do not have a large enough following to really try anymore so I have decided to just quit. I do not at this time want to pay for extra space because once I start paying and continue to add recipes that moment may come where I decide I want to stop paying and when that happens all the extra space I paid for for my blog entries will go away when the monthly payments stop. So the result is why put all that work into something just to lose it once the funds stop? It saddens me to have had to come to this decision but that is just how things sometimes end up.
Sincerely,
TastyTalkWithAmy
About Me

- TastyTalkWithAmy
- My blog is about how to be better organized with your meal planning, you can be one person or a family of 4 or more, planning is the key to knowing what you are going to eat every day and let’s face it, we all have to eat to live! So why not plan it out? It saves time and money! What comes along with meal planning? Ideas for meals! As time goes by I will add recipes I have made for my family that were liked, and anything you see here, was well-received.
Tuesday, January 1, 2013
Tuesday, October 30, 2012
Snickers Cake (Easy)

Cake ingredients:
- 2 cups white sugar
- 1 ¾ cups all-purpose flour
- ¾ cup unsweetened cocoa powder
- 1 ½ tsp baking soda
- 1 ½ tsp baking powder
- 1 tsp salt
- 2 eggs
- 1 cup low-fat buttermilk
- ½ cup vegetable oil
- 2 tsp vanilla extract
- 1 cup boiling water
Directions:
- Preheat oven to 350 degrees. Grease and flour two 9 inch cake pans.
- In a medium bowl, stir together the sugar, flour, cocoa, baking soda, baking powder, and salt. Add the eggs, buttermilk, oil, and vanilla. Mix for 3 minutes with an electric mixer. Mix in the boiling water gently. Pour evenly into the two prepared pans.
- Bake for 30-35 minutes in the preheated oven until a toothpick inserted comes out clean. Cool for 10 minutes before removing from pans to cool completely.
Hershey’s
"PERFECTLY CHOCOLATE" CHOCOLATE FROSTING
Frosting ingredients:
- 1 stick (1/2 cup) unsalted butter, melted
- 2/3 cup Hershey's Cocoa
- 3 cups powdered sugar
- 1/3 cup milk
- 1 teaspoon vanilla extract
Directions:
Melt butter. Stir in
cocoa and powdered sugar. Add approximately a tablespoon of milk at a time beating in until reaching to a spreading
consistency, you may not use the entire 1/3 cup because it may become too wet. Stir in vanilla.
Makes about 2 cups frosting and you will use all of it on the top layer.
Topping and middle layer ingredients:
- 1 jar (1lb 2oz) Creamy Reese’s peanut butter, (yes, you will use it all)
- I jar (14 oz) Hershey’s Caramel topping
- 1 8oz Cool Whip, thawed
- 1 bag (11oz) Nestle Peanut Butter and Milk Chocolate Morsels
- Hershey’s Chocolate syrup
- 3/4 cups unsalted peanuts, I think salted would taste just fine as well so go for it if you have them on hand
Directions:
- Beat the peanut butter and cool whip together until creamy. This is going to be used to ice the first layer only and use all of it, spread it on thick and it will have a lumpy spreading appearance. Sprinkle half the peanuts on top of the peanut butter layer and then drizzle to your liking as much caramel as you like on top of the peanuts.
- Place your second chocolate cake layer on top of the peanut butter middle. Frost the top layer of the cake with all the frosting, only leaving the sides of the cake bare. Top with the peanut butter and chocolate morsels, the rest of the unsalted peanuts, and then drizzle as much as you like of both the syrups: chocolate and caramel, and be sure to let them drizzle down the sides.
Does not need to be
refrigerated.
 |
| Allow both cakes to completely cool on a wire rack. |
 |
| While your cakes are cooling, prepare your peanut butter layer. The only two ingredients you need and yes you use both containers entirely. |
 |
| Middle peanut butter layer. |
 |
| Spread the entire peanut butter mixture over that first chocolate cake layer and you can be lumpy in your application. Lumpy is good looking here and okay. |
 |
| The rest of the needed toppings. |
 |
| Sprinkle about half of the 3/4 cup of peanuts needed, not all the 3/4, that would be too much and then drizzle some caramel over them and you can allow it to drip over the sides. |
 |
| Next place the second layer of cooled cake on top. It looks like a big sandwich cookie! |
 |
| Prepare your chocolate frosting and it prepares quickly so you don't have to make it in advance. Make it right when you need it. It is that quick and easy. |
 |
| Spread the entire amount of frosting over the top only of the cake, not the sides. |
 |
| Next add as much as you can fit of both the the peanut butter and chocolate morsels and peanuts. |
 |
| Next drizzle caramel by the tablespoonful all over and be sure to allow it to drip over and down the sides. Take your chocolate syrup, which is most probably in a bottle and gently squirt it all over the cake top as well, paying attention to allow it to drip over the edges as well down the sides of the cake. |
 |
| Look at that beautiful inside once a slice is removed! |
 |
| My slice. |
 |
| Still my slice from another angle. Filling and delicious! Even better the second day! |
Tuesday, October 23, 2012
Pumpkin Walnut Cheesecake (Intermediate)

Read on if you like........
Cheesecake. Where do I start? Just know, baking and making a cheesecake is an all day job and don't expect to eat it the same day you bake it. You have to make it the day before you plan on serving it. Now getting to this recipe, this entry has been a long time coming. It has been in the back of my mind torturing me to write about it for at least 2 weeks! Oh dear! I have had 2 failed attempts and so that meant both cheesecakes were thrown in the garbage. They are right when they say "the third time's the charm!" and it so is in this instance! Oh what a waste of money, time, and energy. But have no fear! I get to teach you from my mistakes so that you won't duplicate them. I have never before in my life really run into a cheesecake catastrophe until this one. This cheesecake recipe took research and advice from two of my girlfriend's. Thanks Tina and Suzanne! You know who you are! :)
I first found this recipe when looking for something new to make for Thanksgiving this year instead of the traditional pumpkin pie. I will most probably still make that because my son loves pumpkin pie but pumpkin pie can be so plain when there is a pumpkin cheesecake to be enjoyed as well for dessert!
My mistakes: all ingredients need to be at room temperature (I kept mine out at least 3-4 hours) when getting ready to prepare the cheesecake batter and you have to be very careful at how much air you beat into your cheesecake when it comes to using your mixer. Air can make your cheesecake puff during the baking process and then sink as it cools. If you over beat your eggs that can cause cracks to develop in your cheesecake while it bakes. My cream cheese was at room temp; and the obvious reason is so that it is easy for beating. Now my eggs weren't at room temp with my first two cheesecake attempts, a no-no, and if you are not a baker you may not know that. The original recipe did not call for that so I did not do it. To be honest, my eggs are always cold because they are in the fridge. Now as for why the ingredients need to be at room temperature, I cannot tell you why, but I am guessing because the oven does not have to work as hard at baking the cheesecake once you put it in. Heavy cream is called for in this recipe. I did not let that sit out to hit room temp instead I microwaved it for a couple of seconds, no longer, you don't want it too hot, just warmed enough to take the chill off. The eggs, you need to use 5 eggs, and they are to be lightly beaten. You just need to beat the eggs ever so lightly just enough to break the yolks and combine the whites. This is true for any cheesecake recipe so be sure to remember that. Something I did not know! Also another thing I learned is that cheesecakes rely on eggs primarily for structure so however many eggs are called for in the recipe, use, do not omit. Cheesecakes with more moisture added also take longer to bake unless they call for a bit of flour or cornstarch and if so that will change the texture to be more firm and cake-like but this cheesecake does not call for either and it has a lot of moisture added to it; one can of pumpkin, 5 eggs, and 1/4 cup heavy whipping cream. It's no wonder my cheesecake also failed both times!
My first cheesecake attempt was all wrong, no room temp eggs, cold heavy cream, too much beating involved, did the water bath but it was a poor water bath at the least, baked it for the 1 hour and 30 minutes but the middle was still too jiggly. Cheesecake is deceptive; when it is fully done it does not look fully done. A cheesecake fully cooked will become solid near the edges and have about a 2-3 inch circle in the middle that will still be wobbly. Now when I made my mistake the first time, I thought it would firm up once removed from the oven and refrigerated. No, it was still slightly wet and jiggly in the center and would not hold its shape once sliced so I knew I messed up and that it needed to go in the garbage. I also did not know that when you bake a cheesecake that you are to leave it in the oven for 1 hour after the baking process with the door closed to let it cool down in that fashion and at this point it is still sitting in its water bath. I removed it as soon as the 1 hour and 30 minutes of baking was complete. A big no-no also! Once that one hour has passed for cooling, you then remove it from the oven, and then let it cool for at least 10-20 minutes on a wire rack in the spring form pan. Once cooled on the rack and out of the oven, remove the spring form from around the cheesecake before refrigerating it but leave the bottom still intact, you will remove that the next day once it has cooled over night. If you try to remove it at this point you will destroy your graham cracker crust. You will also want your cheesecake to be as cooled as possible before you refrigerate it because a warm covered cheesecake will build up condensation and make your cake soggy.
My second cheesecake attempt was over cooked! Ugh! I still did not know all that I have been writing for the second cheesecake in this blog entry so I am still going at it desperately. This time I skipped the water bath, and just so you know water baths prevent your cheesecake from drying and cracking. I still over beat all my ingredients not knowing that was a no-no and also everything was not room temperature except for the cream cheese. I tried baking it at 350 degrees for the first 10 minutes and then I lowered the temp to 325 degrees and I baked it for 2 hours and 15 minutes. I burned it! Shoot! I left it in the oven once done baking and cracked the door open with a wooden spoon handle and let it cool there and for how long, I can't recall. I was not happy with myself again and so frustrated! I needed to learn how to perfect this recipe or else! I finally did! My third cheesecake turned out awesomely! One tip, cheesecakes are to be baked at 325 degrees, no higher. A long, slow bake guarantees an evenly baked cheesecake with a uniform temperature. I did not do this but do not stick a knife or a toothpick in the center to check for doneness you could possibly start a crack.
I already spoke about the room temperature ingredients, not over beating the entire cake and now I need to speak about the water bath. When you use a 9 inch springform pan you will need a 13 inch roasting pan to use as your water bath. You want about 2 inches all around distance from the edges of the pan for the water to go. Place a dish towel neatly in the bottom of the roasting pan and this is to protect the cheesecake from being scorched from the oven coils. I chose to use a thick bathroom wash cloth because it was the perfect fit and it did not bunch up and create lumps under the cheesecake which then in turn could make your cake bake unevenly. Next you need to bring a pot of water to a rolling boil because if you use water from the tap to surround your cheesecake you make the oven work harder at heating that up and then that takes away from the baking process of the cheesecake. The water bath is to keep the cheesecake from cracking. Cheesecakes are very finicky as I have found out. Place your roasting pan complete with wash cloth or towel in bottom, first in the oven, then place your cheesecake that is wrapped on the bottom with heavy duty foil to prevent water from seeping in in the dead center. Take your pot of boiling water and very carefully pour that hot boiling water slowly until you fill up just enough but below the edges of the foil that you used to wrap the bottom of the spring form pan and you do not want to splash any water into your cheesecake either, so go very slowly. Slowly push the rack into your oven without sloshing the water around and getting it in between the foil and the spring form pan and shut that door and do not open it until 1 hour has passed when you need to put on the walnut topping.
The initial hour has passed and now it is time to carefully sprinkle the crumbled walnut topping over the top of the perfectly baking, crack-free, cheesecake. Slowly pull the rack forward out of the oven and as quickly and carefully as possible place that crumb walnut topping all over. Don't push down when you are applying the topping, you could crack the top layer. It is pretty sturdy on top after this initial hour of baking so don't worry about thinking that you will crack it from the weight of the topping because it feels that way when you are putting it on. Don't worry also if you don't cover every square inch of the cheesecake, it will melt and spread out evenly all over the top and even over the edges. Once you have put all the topping on top, slowly push the rack back into the oven and shut the door and do not open it again until 30 minutes longer has passed. When I was at the 30 minutes longer point I opened the oven door and just moved the rack slightly to see if the cheesecake was still too wobbly in the middle and for me it was so I left it in there to cook for another 20 minutes, no longer. I then did not open the door after that 1 hour and 50 minutes of baking time and just turned the oven off because I knew that if I cooked it any longer than that it would have burned. I left the oven door shut once I turned off the oven and set the timer for one hour and walked away. Once the hour had passed and it cooled off on its own inside the oven, I then removed the cheesecake from the water bath and placed it on a wire cooling rack for 10-20 minutes. Once those last 10-20 minutes passed I removed the spring form. I did not run a knife around the edges because if I had it would have ruined the crumb walnut topping by cracking it off in big pieces off the top of the cheesecake edges because it bakes over the edges and I did not and could not disturb those edges. I had already come this far in almost cheesecake perfection and was not about to ruin it by cracking the topping! I then placed the cheesecake in the refrigerator in my storage container and called it a night!
The next day I finally got to see my cheesecake creation. It was beautiful! No collapsing, no cracks, not burned, it was near perfect! The reason I say near perfect is that there is always room for improvement. I now have the confidence to make another cheesecake in the future and not dread it! I did not give up and I learned a lot. Okay, so now the recipe and pictures follow below. Sorry that this blog entry is so long, I needed to include everything to teach others.
Recipe credit: Taste of Home
Ingredients:
Crust:
2 cups graham cracker crumbs
1/4 cup sugar
6 tablespoons butter, melted
Filling:
3 packages (8 ounces each) cream cheese, softened
3/4 cup sugar
3/4 cup packed dark brown sugar
1 can (15 ounces) solid-pack pumpkin
1/4 cup heavy whipping cream
1 teaspoon ground cinnamon
1 teaspoon ground cloves
5 eggs, lightly beaten
Topping:
6 tablespoons butter, softened
1 cup packed dark brown sugar
1 cup chopped walnuts
Directions:
- Place a greased 9-in. springform pan on a double thickness of heavy-duty foil (about 18 in. square). Securely wrap foil around pan. In a small bowl, combine cracker crumbs and sugar; stir in butter. Press onto the bottom and 1 in. up the sides of prepared pan. Be sure to first lightly grease the pan with butter on the bottom of the pan and all the way up the sides. This will prevent the batter from creeping up the side and then falling.
- In a large bowl, beat cream cheese and sugars until smooth. Beat in the pumpkin, cream, cinnamon and cloves until blended. Add eggs; beat on low speed just until combined. Pour over crust. Place springform pan in a large baking pan; add 1 in. of hot water to larger pan or just enough to not go past the foil wrap on the bottom of the springform pan.
- Bake at 325° for 1 hour. For topping, in a small bowl, combine butter and brown sugar. Stir in walnuts. Carefully sprinkle over hot cheesecake.
- Bake 30-50 minutes longer or until center is just set. Turn oven off and keep closed and let cool for 1 hour, remove spring form pan from water bath and then cool on a wire rack for 10-20 minutes. Remove spring form from cheesecake carefully and then refrigerate overnight. Yield: 12 servings.
 |
| Start out making the graham cracker crust. |
 |
| I first placed the heavy duty foil around the base of the sprinform pan and be careful not to slide it around on your counter top because you could easily tear it and then water could seep in from the water bath while baking. |
 |
| 3 sticks of softened cream cheese and both sugars. Beat until creamy but remember if you over beat you can add too much air so use your best judgment. |
 |
| Pumpkin, cream, and spices added next to beaten cream cheese mixture. Again, go easy on beating here as well. |
 |
| The slightly beaten 5 eggs. Do not over beat these eggs or else you will create extra air in your cake. |
 |
| I quickly and gently beat in the eggs and hoped and prayed I did not mess this part up! I just used the hand mixer on low as quickly as possible to combine the batter and the eggs together. Folding in was just not an option, does not combine it well. |
 |
| The disposable roasting pan I used. I did wash it and keep it for the future to use again. |
 |
| The wash cloth I used to protect my cheesecake from being scorched. This size wash cloth fit pretty much perfectly. |
 |
| Boiling water for water bath. A must! |
 |
| Cheesecake placed dead center in middle of roasting pan and if you notice there is no water surrounding it yet. Wait until you place the roasting pan on the oven rack to carefully pour the boiling water around it. The pan is too flimsy to carry with hot water without you accidentally getting water between the foil and the springform pan not to mention you could burn yourself through the flimsy roasting pan with such hot water. Being careful and safe is key here. |
 |
| Boiling water has been added and just right below the shortest point where the foil comes to. You do not pour the water as high as the highest point where the foil comes up to! You pour it only up to the lowest point. Remember that! |
 |
| Now that you finally got your cheesecake in the oven, make the walnut topping and just set aside on the counter top until 1 hour of baking passes for the cheesecake. |
 |
| Look at that cheesecake! It is perfect! It is only the initial hour of baking and look how gorgeous it is! No cracks and not burned! Exciting! |
 |
| Now that the cheesecake has baked for 1 hour it is time to add the walnut topping. As you can see it is not evenly covering the cheesecake but that is okay it will melt and spread itself out as it bakes longer. Do not pull the cheesecake out of the oven but pull the rack out slowly or you will spill water or possibly have it accidentally get between the foil and springform pan. Place the topping on top as quickly as possible without burning your hand and allowing for too much heat to escape. |
 |
| Look at that! 1 hour 50 minutes of baking and then 1 hour of oven cooling with the oven turned off and the door not opened at all and it is GORGEOUS!!!!!! |
 |
| Out of the water bath, did not collapse, no cracks, just perfect! Time to cool some more before I remove the springform ring from around the edges. I did not use a knife to separate the edges for fear of cracking the yummy walnut topping and as you can see it does bake over the edges. |
 |
| Look at that after I remove the springform ring! Just gorgeous! I was so pleased with myself! |
 |
| The next day after it has chilled over night in the fridge and if you notice the silver piece from the bottom of the springform pan is now removed. You do this once the cheesecake is completely chilled so that you do not crack the graham cracker crust. Take a very long knife and slowly slide it under your cake and then carefully place it on top of your storage dish, plate, pedestal, whichever. |
 |
| Look at that beautiful slice! My slice! The fruits of my labor delivered! |
Coffee Kahlua Cupcakes (Easy)


Recipe credit: Dee Swoboda
Ingredients:
- 2 1/4 cup all purpose flour
- 2 cups sugar
- 3/4 cup cocoa, unsweetened
- 1 1/2 tsp baking soda
- 1 tsp baking powder
- 1/2 tsp salt
- 1 cup vegetable oil
- 1 cup strong brewed coffee (cooled)
- 3 lg eggs
- 1-8 oz sour cream 1 tsp pure vanilla extract
Cupcake Directions:
Preheat the oven to 350 degrees F. Line muffin pans with paper liners
and set aside. In a large bowl, whisk flour, sugar, cocoa powder,
baking soda, baking powder, and salt. Add oil, coffee, and eggs. Beat at
medium speed with an electric mixer until smooth. Mix in the sour cream
and vanilla. Spoon the batter evenly into prepared muffin cups(approximately 2 heaping tablespoons worth in each), filling
each 2/3 full. Bake until a toothpick inserted in center comes out clean,
for 18 to 20 minutes. Let them cool in pans on wire racks for 5 minutes.
Remove from the pans and cool completely on wire racks.
Cream Filling:
- 3 oz cream cheese(softened)
- 1/4 cup coffee liqueur
- 1-8 oz chocolate cool whip (thawed) (I could not find Chocolate Cool Whip but I found a new item by Cool Whip called Cool Whip Frosting in chocolate flavor, 10.6oz) (picture below)
Filling Directions:
Take 3 ounces of the package cream cheese, softened, 1/4 cup coffee-flavored
liqueur, 1 cup(8 oz) container frozen chocolate flavored whipped
topping, thawed. In a small bowl, whip the cream cheese at medium speed
with an electric mixer until smooth. Slowly add the liqueur and fold in
the whipped topping. Spoon coffee cream filling into a squeeze bottle with a long narrow tip. Place in refrigerator to chill until needed for filling. Once cupcakes have completely cooled insert tip into center of cupcake and squirt approximately 1 tablespoon worth of filling in each.
Coffee Buttercream Frosting:
- 5 oz cream cheese(softened)
- 1/2 cup(1 stick) unsalted butter (softened)
- 2 tbsp unsweetened cocoa powder
- 2 cups powdered sugar
- 1/4 c strong brewed coffee (cooled for frosting)
- chocolate covered coffee beans for garnish or Baker's semi-sweet chocolate shavings (optional)
Frosting Directions:
In a medium bowl, take 1/2 cup unsalted butter, softened, 5 oz cream cheese, softened, and beat at medium speed until creamy. Add 1 tsp vanilla, 2 tablespoons cocoa powder, and gradually add the 2 cups of powdered sugar, beating until smooth. Gradually add the 1/4 cup strong
brewed coffee and then beat until
frosting has a sheen to it. You may want to place the frosting in the refrigerator to chill to make it a little stiffer for spreading on top of the cupcakes, about30 minutes to an hour. I found mine to be a bit too soft for spreading if used immediately after beating. Once cooled enough for spreading and cupcakes are cooled enough for filling, do the entire process. First fill the cupcakes with filling, then top with frosting and if you like garnish with a chocolate covered coffee bean or chocolate shavings.
 |
| Whisking the flour, cocoa, sugar, baking soda, baking powder, and salt together. |
 |
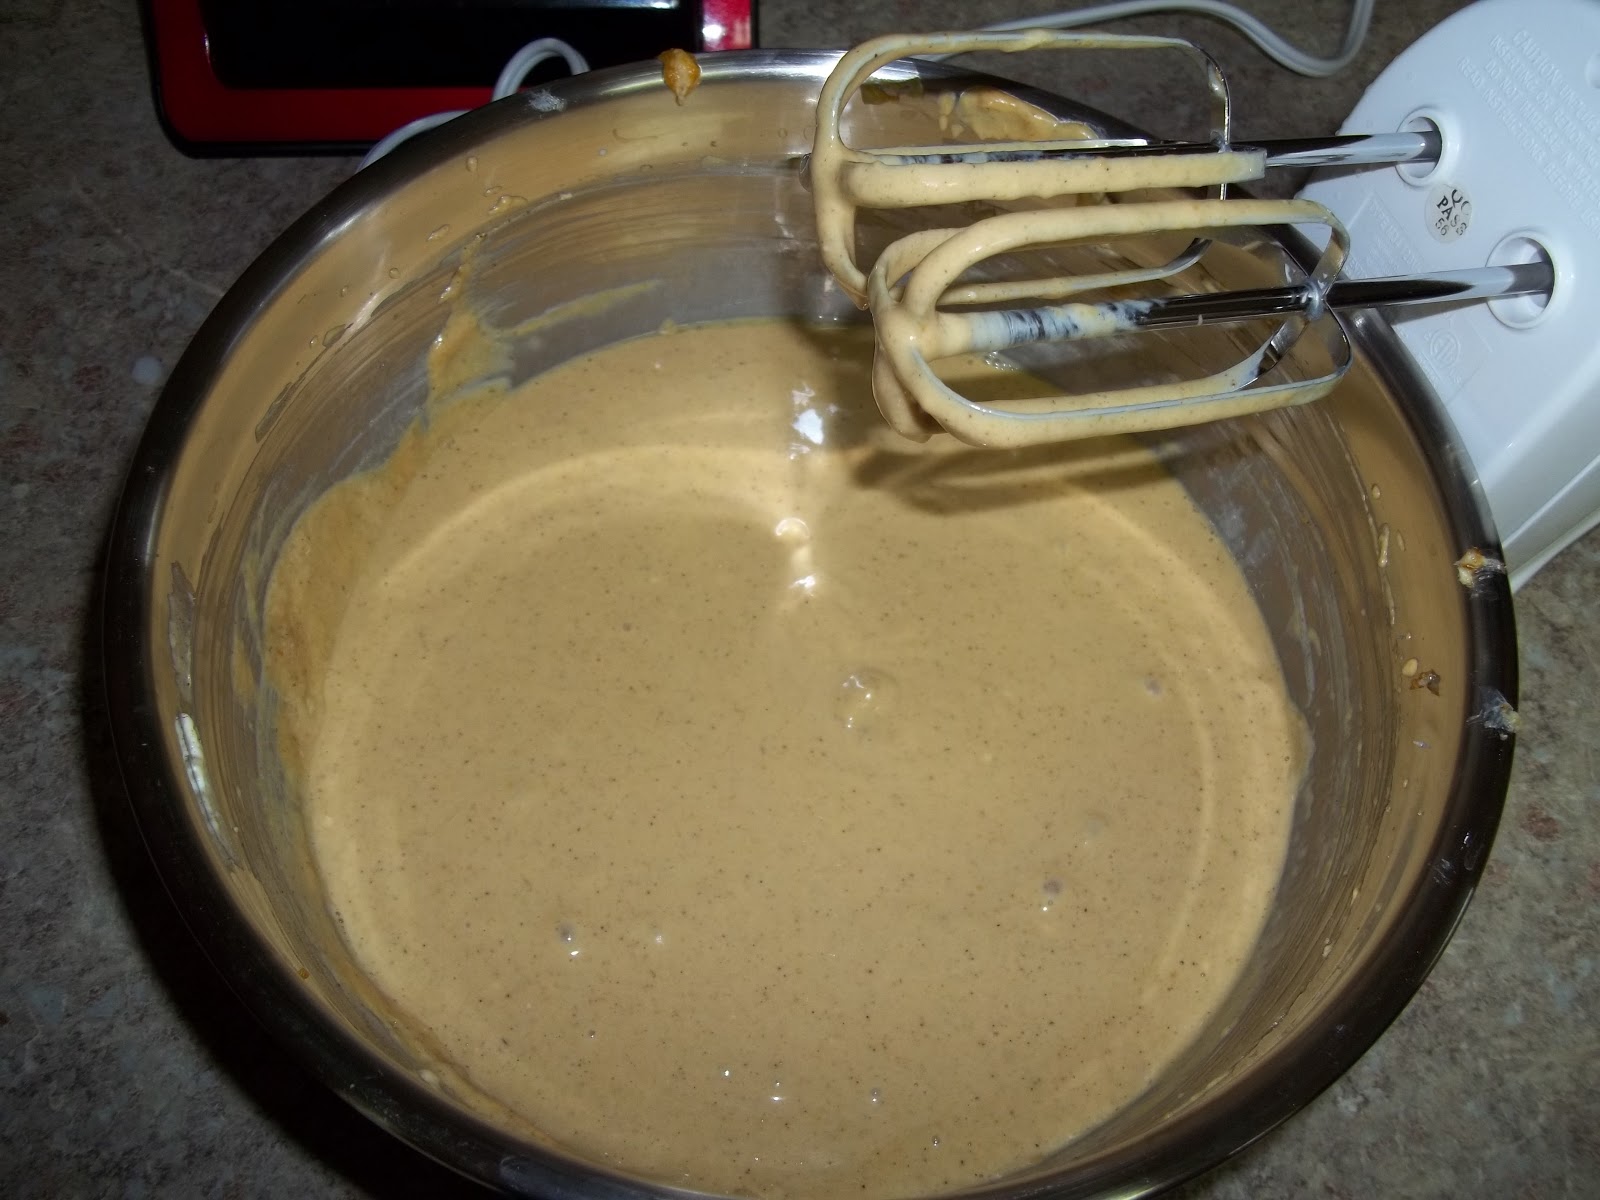
| Next added the oil, eggs, and coffee. I also then mixed in the sour cream and vanilla. |
 |
| It filled up all 24 cupcake papers quite nicely. I used approximately 2 heaping tablespoons worth in each. |
 |
| Cream filling ingredients. I found this Kraft brand Cool Whip Frosting in the freezer section and bought it since I could not find actual chocolate Cool Whip that day. I know it is made, maybe it was out? Oh well, I think this stuff is awesome! Get it! |
 |
| As you can see this cream filling still has some chunks or lumps of cream cheese in it, just beat it a little bit longer until it smooths out. |
 |
| When I first was reading this recipe and it said to use a plastic bottle with a long, narrow tip for inserting the filling into the cupcakes I automatically thought about the plastic bottles used for ketchup at picnics. This worked perfectly and the mouth, when the lid is removed, is large enough to use a teaspoon for spooning all the filling inside and then you just bang it on the counter top for the contents to settle to the bottom as you fill it up. |
 |
| Cream filling, the entire mixing bowl fit in this bottle. It is ready to go in the fridge and chill. You want it cold so that when you squirt it into the middles it stays somewhat formed in the center. |
 |
| Cooling cupcakes on wire rack. |
 |
| Time to fill the cooled cupcakes. |
 |
| I would say there is no right way or wrong way to fill the cupcakes. Yes you cannot really see what a tablespoon amount looks like when you squirt it from the bottle because the cupcake is not see-thru. I had some where the filling came up and out a little bit but once you spread the frosting over it, which is the same color, you can't even notice you used too much. |
 |
| I would say I filled about half just right and by just right I mean that they did not come back up erupting like a chocolate volcano. |
 |
| I thought I had chocolate covered coffee beans hiding in my freezer but they were gone so instead I used Baker's semi-sweet chocolate and shaved it with a potato peeler. I only needed one entire square of chocolate for all 24 cupcakes. As I shaved the chocolate I would top it on each cupcake. It added a nice touch to finish them off. |
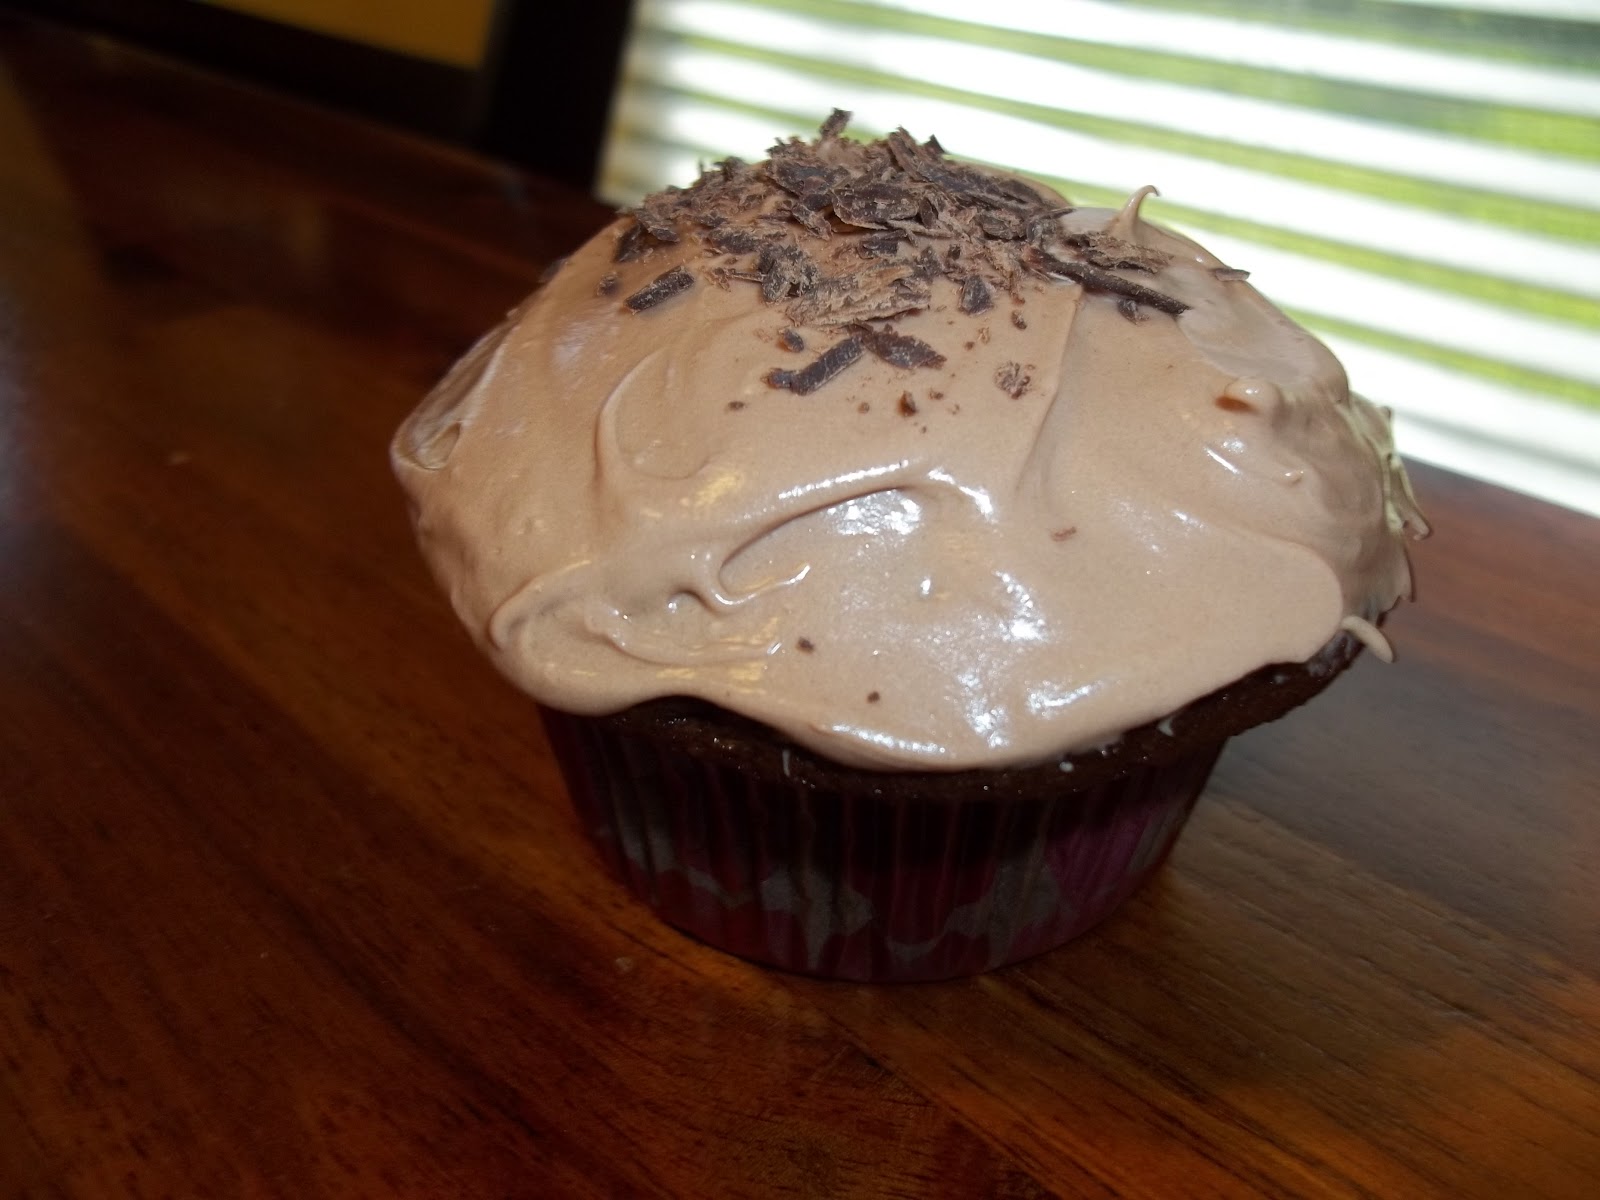 |
| And here you have it! The finished cupcake! It tastes like a labor of love once you take that first bite! |
 |
| A close-up of one sliced open. |
Subscribe to:
Posts (Atom)